Follow this workflow to design your website from scratch
Follow these 6 steps to design your professional website from 0 to 1

As a beginner, we always tend to start designing the main website with all the details right from day one and that might not the best way.
Step 1: Build the design/style guide
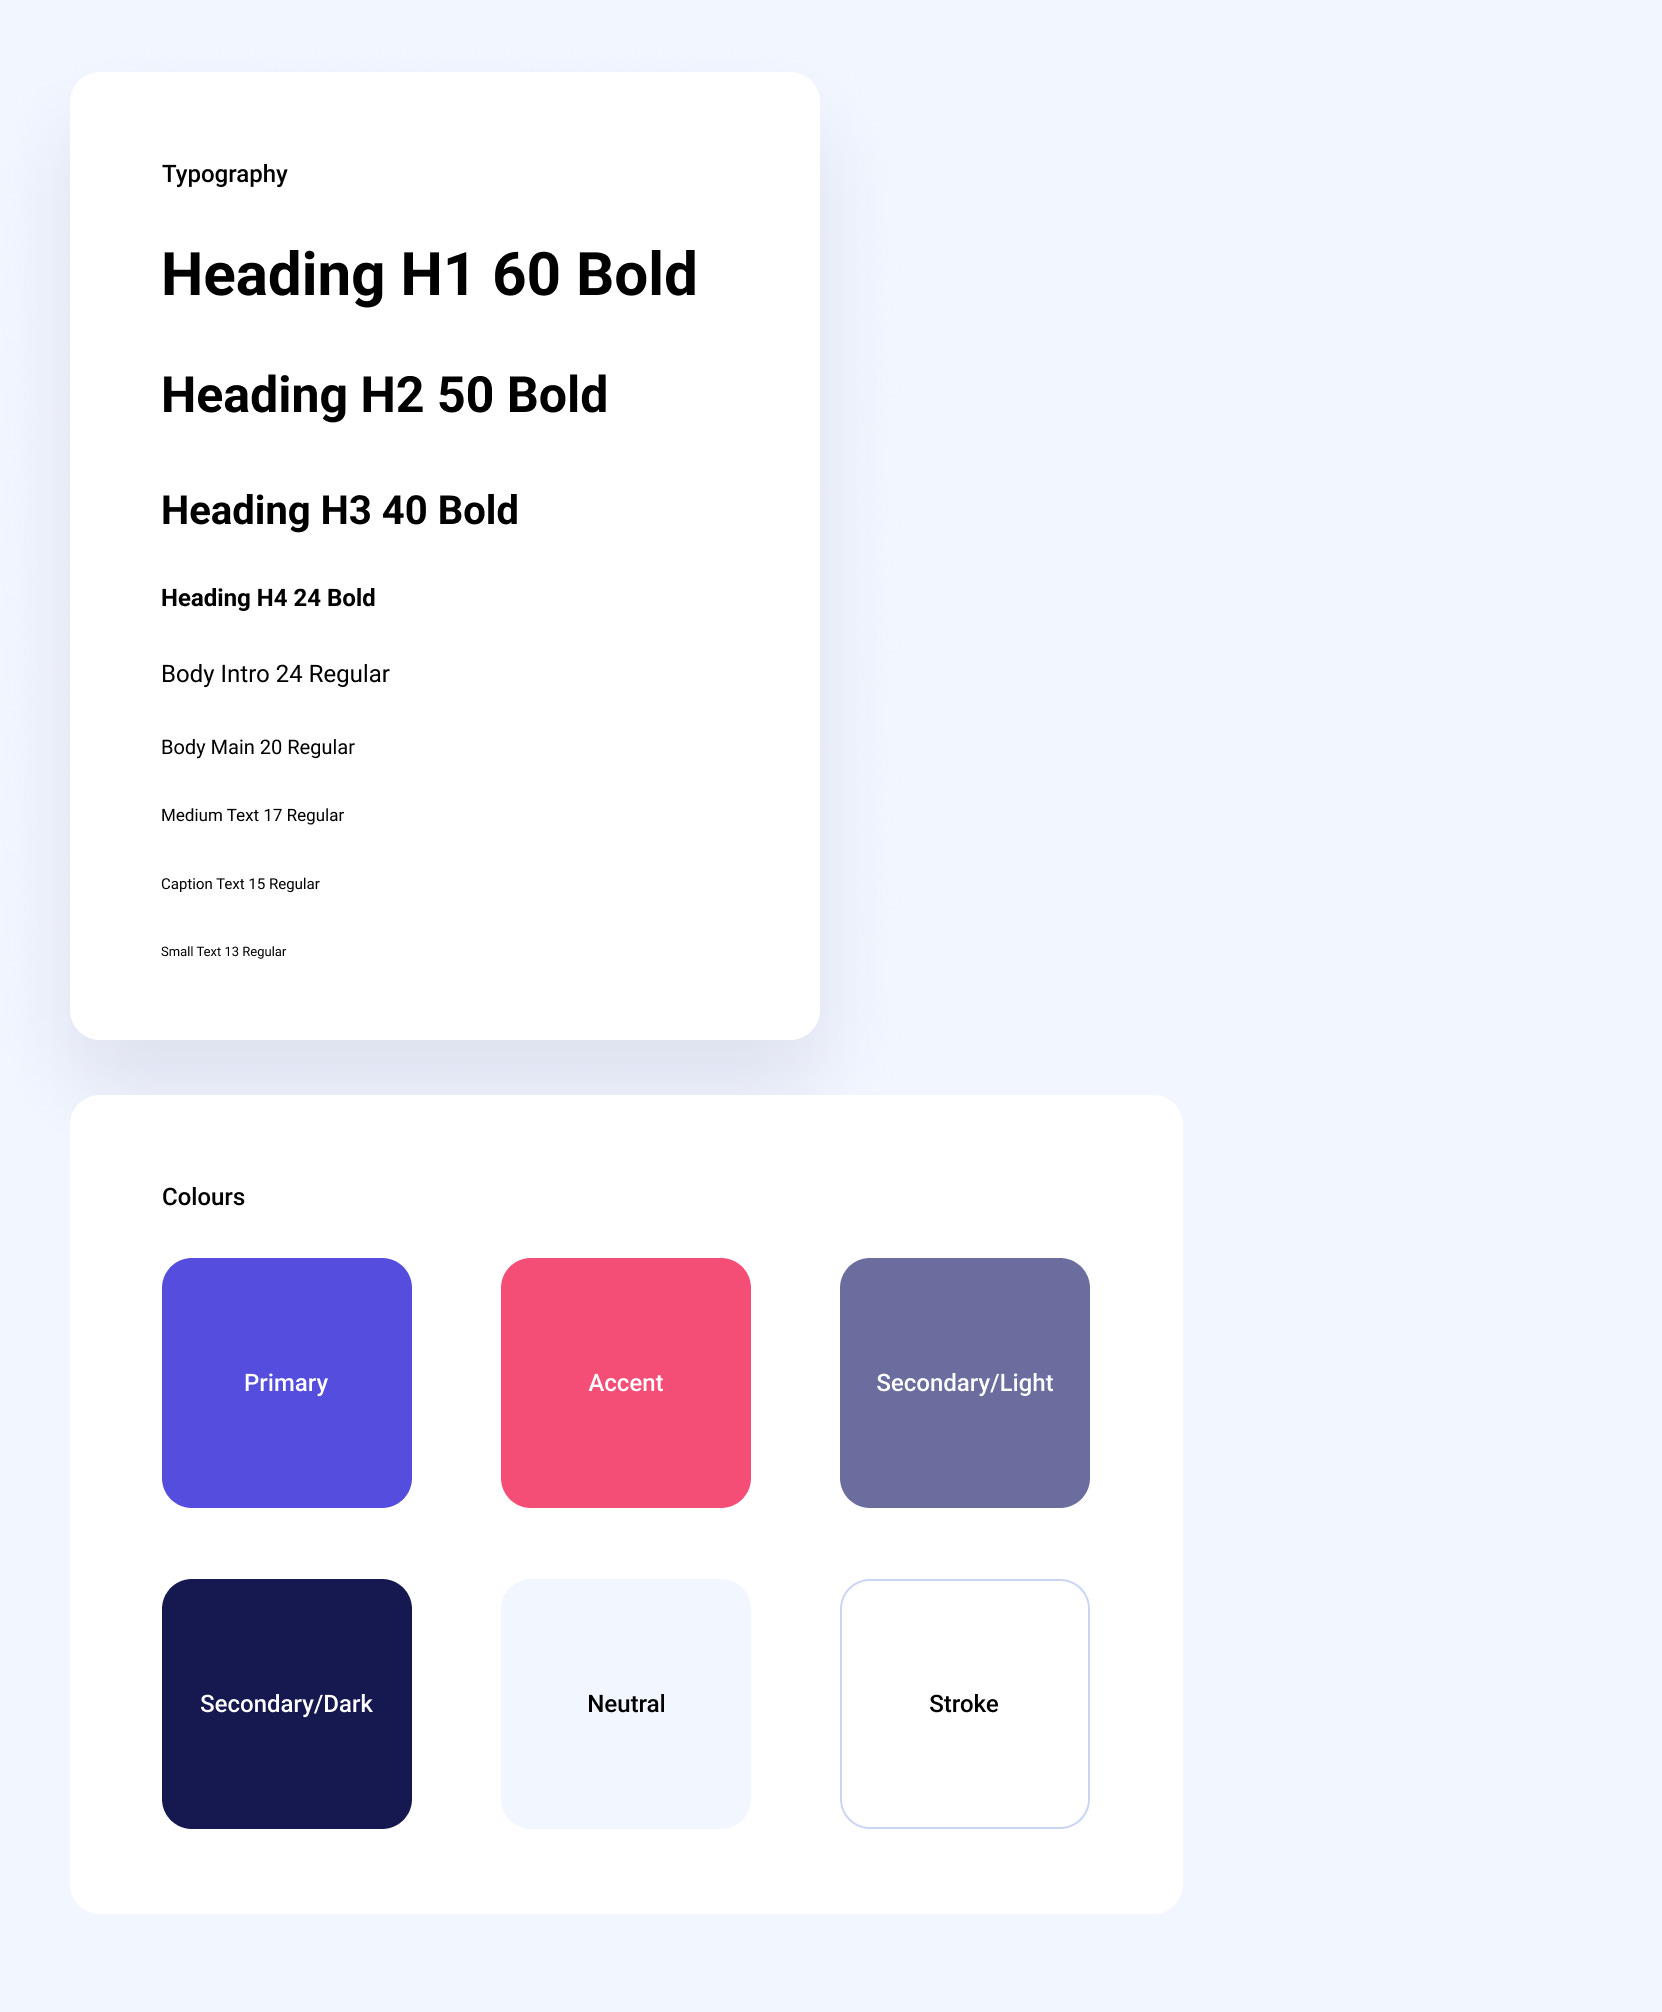
The best way to systematically follow a consistent design all over the website is to create a style guide. A basic style guide consists of the following:
Colours
Typography
Borders
A style guide looks something like this:
Depending upon the software used, create a design guide and make them as reusable assets/components.
The requirements for the design guide depends upon the brand and design language of the product/service in focus for which the website is built. If you have a client, getting help from them for this will be ideal.
Step 2: Build Low fidelity mocks/wireframes
After the style guide, creating low fidelity mocks gives a fair idea of how the final website will look like. The images and texts can just be placeholders.
Here is how a wireframe of a website’s “Hero” section may look like.
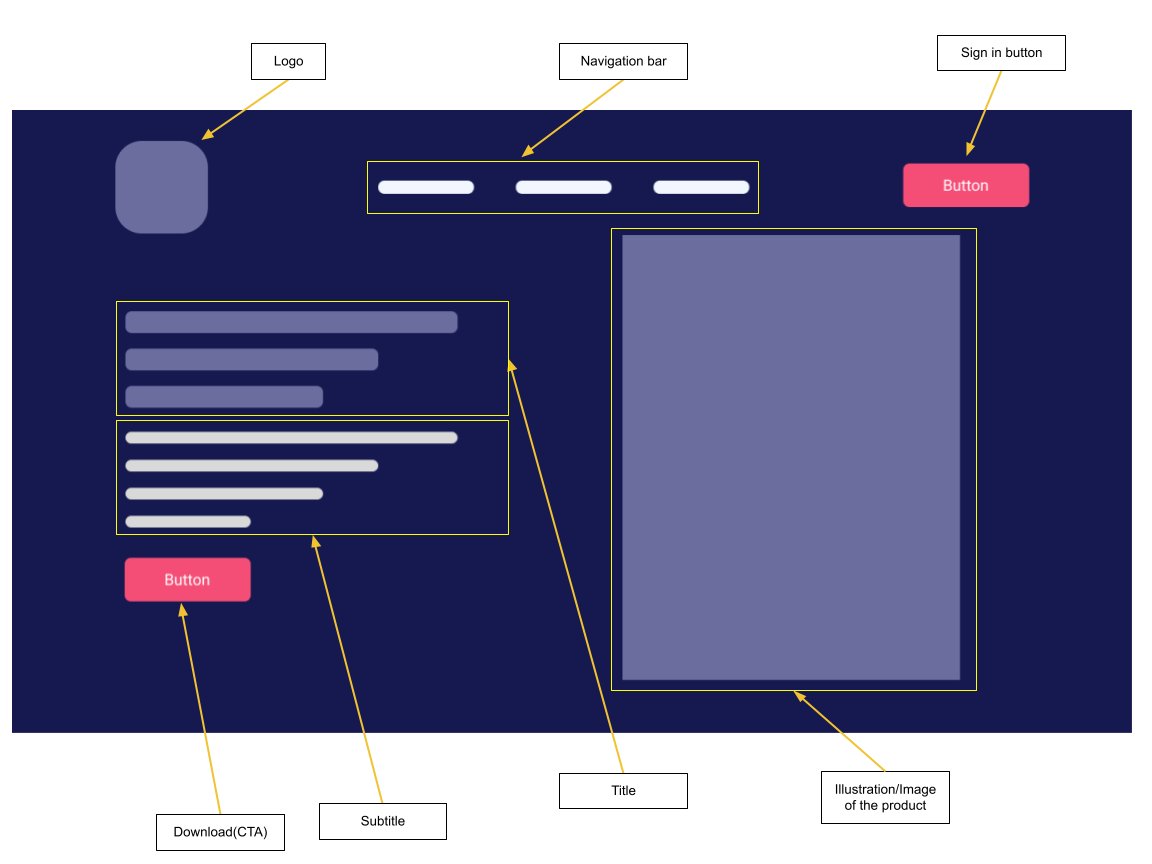
CTA stands for Call to Action.
During this step, we can create reusable components like buttons, cards, forms, etc.
Step 3: Collect all the assets required
These are the stuffs which go into the placeholders of the wireframes in the final website. Some of the common assets are:
Images
Illustrations
Logos
Icons
Videos
Audios
Texts
Similar to design guide, assets are also something which complements the brand of the product/service. If you have a client, they should be able to provide you with these or depending upon your skillset, you could also step in for creating them.
Step 4: Start designing the website / High Fidelity design
Now using all the design guides, wireframes and assets we can step in to build the actual website.
Here is the landing page built after performing above steps.
Unlike low fidelity mocks, follow the visual hierarchy(consistent size, colour, alignment, contrast, proximity, repetitions and whitespace) in your high fidelity design.
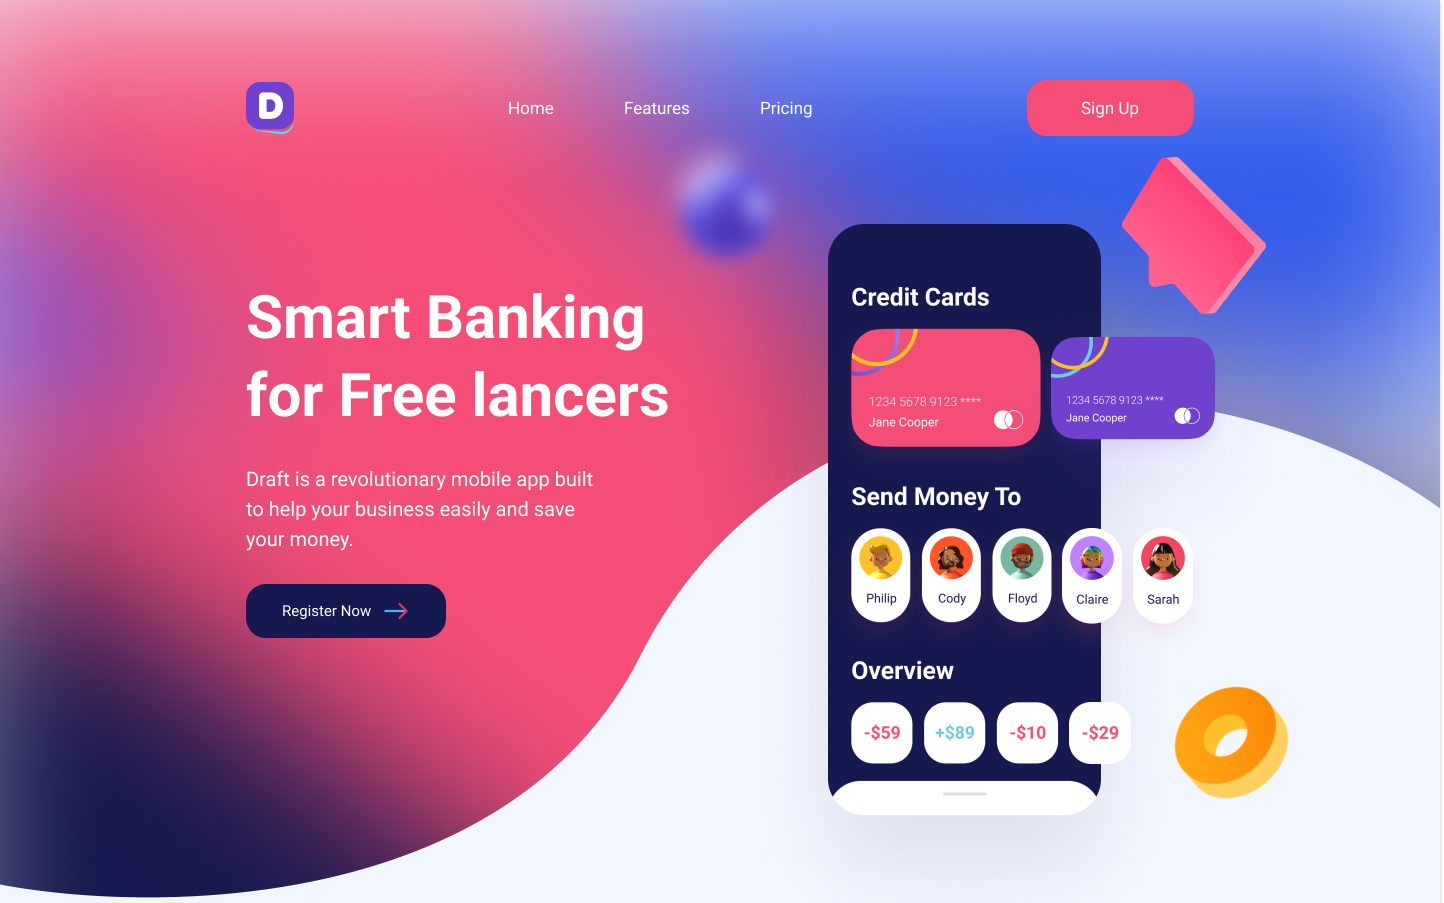
Add creative elements to elevate the experience of the website. This can be designing the backgrounds, adding effects like shadow, using 3D illustrations and following the recent design trends.
Step 5: Prototype the design
After the final design, prototyping the website is the best way to show how the actual website will functionally work, covering the flow of the website.
In advance prototyping, the actual interactions with the website are also taken into account, which can be used by the developers to know how your design should be converted to code.
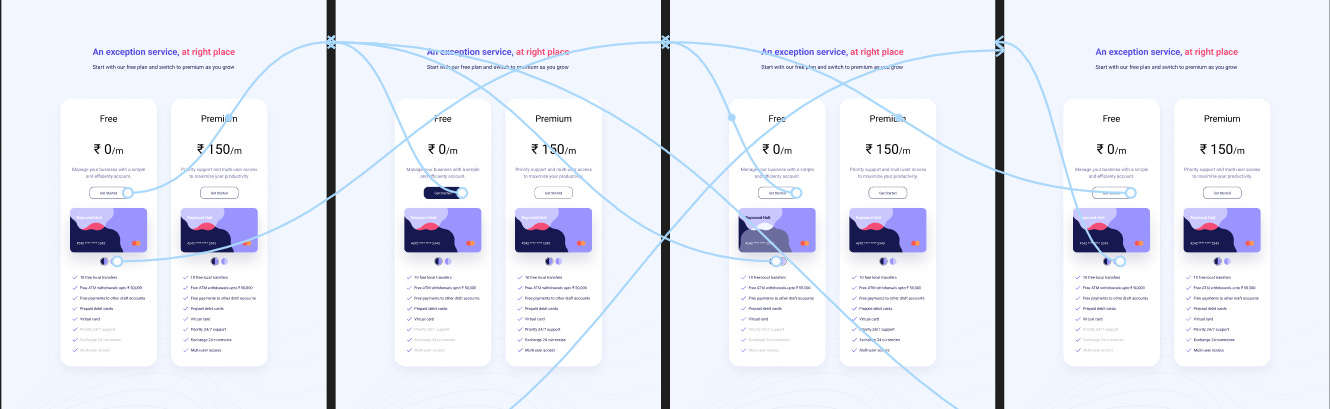
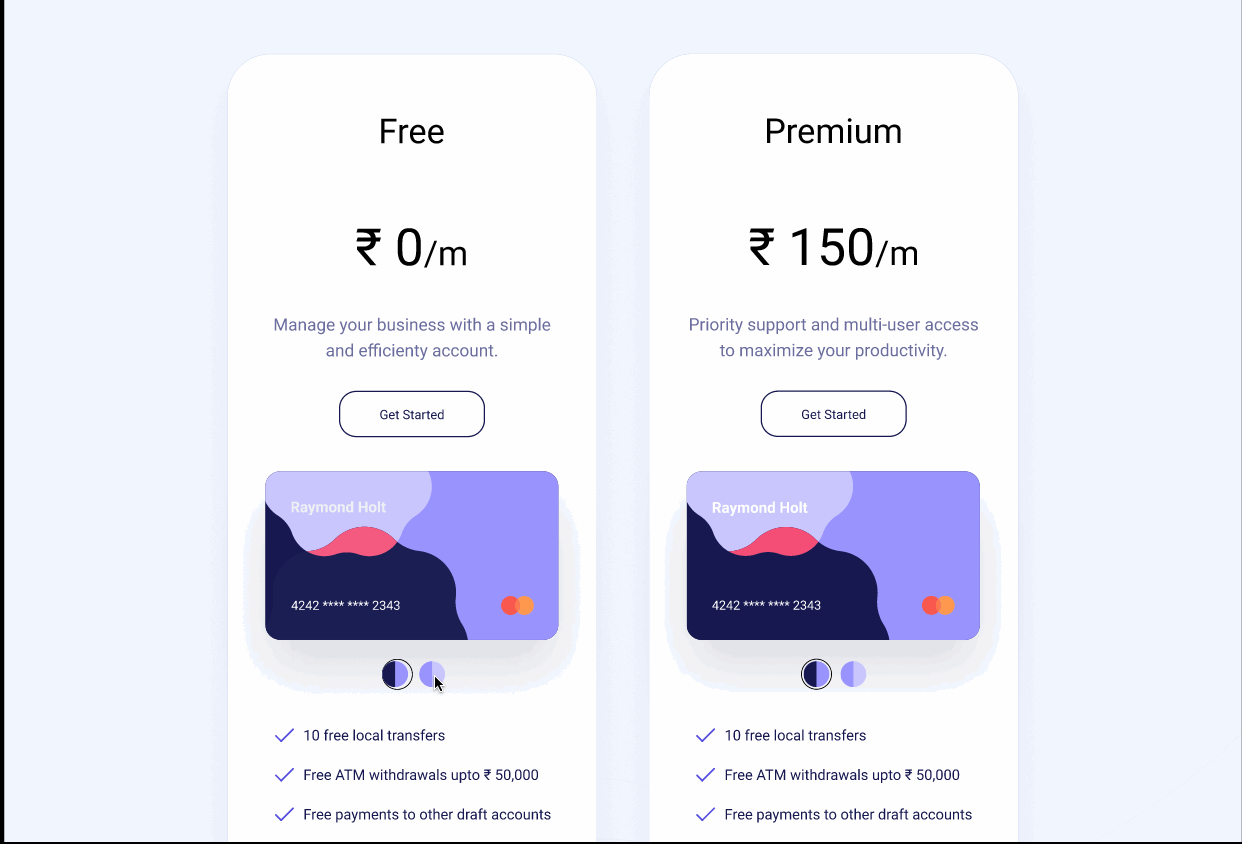
Here is the result of prototyping the “Theme of Credit Card” using Figma. The design of the credit card changes between two accent colours when the user selects the theme.
Step 6: Share the work
Final step is to do the presentation using the prototype and share your final work, If you are sharing the work to your client or developers, include
Final design file
Prototypes
Wireframes
All results exported to preferred format
Styleguide
Assets
and other required materials and reusable components to implement the website.
Conclusion
Buckle up and start designing websites for your ideas. If you don’t have any idea top of your head use random idea generator like https://ideasai.com/ and start designing website for them.
All the works in the screenshots are done using Figma, which is a free design tool for individual users.
Use Vectary to create 3D illustrations.
Also read:
Links and References
Skillshare course by Arash Ahadzadeh - Learn Figma: User Interface Design Essentials - UI/UX Design
Youtube Channel by Ran Segall: https://www.youtube.com/c/FluxWithRanSegall
Free design tool: https://www.figma.com/
Create Free 3D illustrations: https://www.vectary.com/
Get AI generated ideas for free: https://ideasai.com/